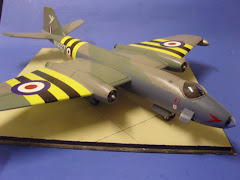
Hunter F.6 001
Originally uploaded by sisaphus
The Academy Hawker Hunter kits can be a real pain to put together, particularly getting the wings properly aligned and there are also problems with the cockpit.
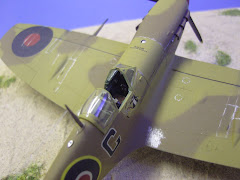
Starting with the cockpit, the kit parts are very basic and worst of all under scale , the ejector seat is closer to 1/72 than 1/48. Fortunately there are a number of replacements available from after-market suppliers and I chose to use the resin and photo-etch cockpit set from Aries. This includes separate etched harness for the bang seat allowing some variation, unlike the all resin ones that all look exactly the same. A further benefit of having a large lump of resin in the nose is that it helps to balance the model overcoming tail sitting.
The problems with fitting the wings was not so easy to solve as they stem from the way the way Academy designed the kit. They have included the intake trunking and the engine compressor fan which all have to be assembled and inserted into the fuselage before it is glued together and the wings built as separate sub-assemblies are then meant to slide over the parts of the trunking that protrudes though the sides of the fuselage. However there is no clear indication or positive location points to ensure that the assembly is aligned so that the trunking is square to the fuselage's vertical datum line. This is further complicated by the huge wing root cutouts in the fuselage sides into which the wing sub-assemblies are supposed to slot, with only small locating lips a the front and back. Their profiles do not match those of the the wings in depth, the distance between top and bottom of the wings is less than the cutout's resulting in gaps. In the end, after a couple of abortive attempts resulting in damage to the trunking I resorted to building a stubby box spar profiled to fit inside the wing roots using plastic card in place of the trunking. With this in place inside the completed fuselage I was able to adjust the alignment by simply rubbing down the upper or lower surface until the wing slid into place correctly. Of course this meant that the plastic card spar was visible through the intakes, but a couple of FOD guards also fabricated from plastic card solved this difficulty.
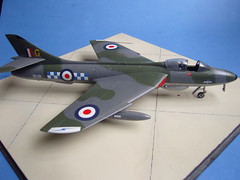
Once this was done the rest of the kit was straight forward and resulted in a model that looks like a Hunter capturing its elegant lines.
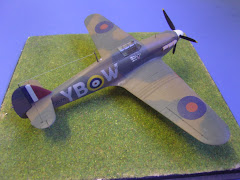
The model was finished in the markings of no. 19 Squadron using Aeromaster decals, the paint used for the camouflage was Extracylics and the undersides were painted with Tamiya titanium silver.

This work by Roland Turner is licensed under a Creative Commons Attribution-Share Alike 2.0 UK: England & Wales License.