 The VC-10 holds a special place in the hearts of many aviation enthusiasts, few aeroplanes can come close to, and I would contend, that none can surpass it for sheer elegance. It is one of those aircraft that just has that certain something extra about it - call it charisma if you like.
Needless to say, by modern standards the design is uneconomic, grossly fuel inefficient and no doubt the greenies will claim it has a carbon footprint the size of Canada (Just what does a carbon footprint look like anyway!?). However the Royal Air Force continue to operate a handful in the transport and air-to-air refuelling rolls and will continue to do so for another four to five years, by which time they will have clocked up half a century of service.
Given its popularity, the VC-10 has not been well served by plastic kit manufacturers with only the Airfix 1/144 scale example being widely available. Originally issued in their "Skyking" range in the 1960s with BOAC markings it was retooled as an RAF Mk K.2 tanker.
I have always felt that the late BOAC livery of royal blue cheat lines and tail fin with the gold 'Speedbird' emblem was designed for the VC-10 perfectly highlighting the aircraft's regal lines and this was the scheme in which I wanted to complete my model. As I only had a K.2 version of the kit to work with this meant 'back converting' it to the airliner version and finding suitable replacement decals. Also I was working to a target date for completion, the model was to be part of an exhibition celebrating British Jet Aircraft in Birmingham's Central Library.
Converting the kit was fairly straight forward, the ventral refueling bulge was cut away from each fuselage half and the resulting hole filed with 40 thou. plastic card bent to match the curvature of the fuselage any discrepancies being corrected later with filler. The locating slots for the wing mounted hose reel drums were similarly filled with plastic card and rubbed smooth with wet & dry glass paper. A fair amount of lead shot was secured in the front fuselage with Milliput to ballast the model and prevent 'tail sitting' and the side windows were blanked off internally with plastic card and filled before joining the fuselage halves together.
Having allowed 48 hrs for the cement to thoroughly dry a quick inspection revealed a problem, the tail fin, moulded integrally with the fuselage was leaning over to starboard at very noticeable angle. There was only one solution, cut the ******* thing off and re-mount it. It soon became clear the plastic along the joint between the fin and the fin was very thin (causing the problem in the first place) so it was necessary to insert a plasticard plug onto which the now separate fin could be attached and all resulting gaps filled with Milliput and sanded down.
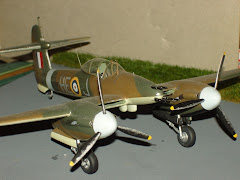
The kit engines were discarded and substituted with Bra.Z Models resin replacements picked up at Scale Modelworld, click link below for their full range of resin kits.
The wings tailplane and painting will be dealt with in a future post.
Bra.Z Models kit list

This work by Roland Turner is licensed under a Creative Commons Attribution-Share Alike 2.0 UK: England & Wales License.


No comments:
Post a Comment